Easily Build Free eCommerce Website with Ecwid
There tend to be no shortage of problems that get in the way of launching your business, but setting up a beautiful eCommerce store shouldn’t be one of them.
In today’s world, there is no shortage of platforms you can use to build your site, such as Woocommerce, Shopify, Squarespace, and even Wix. But these platforms often come with pesky fees and interfaces that aren’t as user-friendly as we’d like.
Solution?
Build a free ecommerce website with Ecwid.
To help you get your online store up and running, we’re going to show you how to create a beautiful website, populate the site with your products, and add in additional business details on through your Ecwid dashboard.
And you’ll be able to gain all of this for the slick price of $0 with Ecwid’s forever free plan. You’ll be surprised at how quick this process is. If you’d like, follow along on a separate tab.
Registering with Ecwid
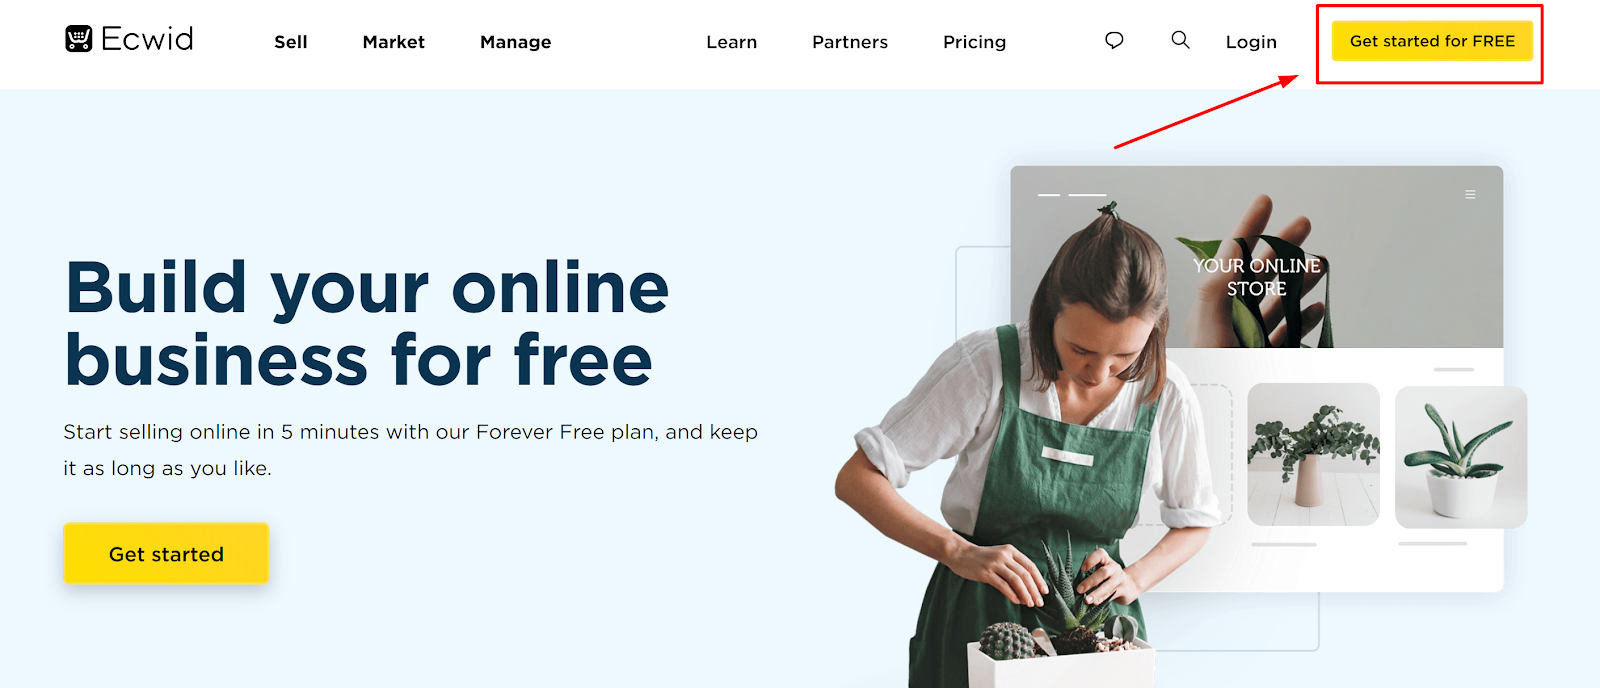
The first step is to head over to Ecwid’s homepage and click on the yellow “Get Started for FREE” button in the top right.

You’ll be taken to a basic form where you’ll have the option to either fill in your personal details manually or simply sign up with Facebook, Google, or PayPal.
Step 1: Choose Your Online Store Name

Once you’ve clicked get started, you’ll be taken to the first page of the registration process.
In the first box, enter the name of your online store. If you don’t currently have a name for it, this is your chance to choose one! Here are some best practices to consider when deciding on your store name.
- Keep the Name Short and Simple — Try to limit the store name to three words or less.
- Choose a Unique Name — While you don’t want the name to be too far out there, you do want to make it distinct from your competitors.
- Make sure the domain name is available — To find out if the domain you want for the site is available, head over to name.com, and enter the domain name you’re thinking of into the search bar. It’ll inform you right away if it’s available or not.
If you can’t decide on a website name immediately, don’t worry. You can always come back to it later in your store’s Ecwid dashboard. In this situation, it’s best to choose a temporary name and move on to the next step.
Step 2: Enter Your Company Address

Add the address of your company. This will allow you to set up delivery options and get paid.
Not everyone has a company address, of course. In fact, many small business owners today simply operate out of their homes since all you really need to start the business is a laptop and an internet connection.
If you’re in such a position, just use the address of where you will be shipping your orders.
Step 3: Extra Details About You and Your Business

Now that you’ve entered in your company address, it’s time to share some extra details. If you click each of the dropdowns above, you’ll be shown a set of answers to choose from. Once you’re done answering these three questions, hit next.
Step 4: Entering in Your Website
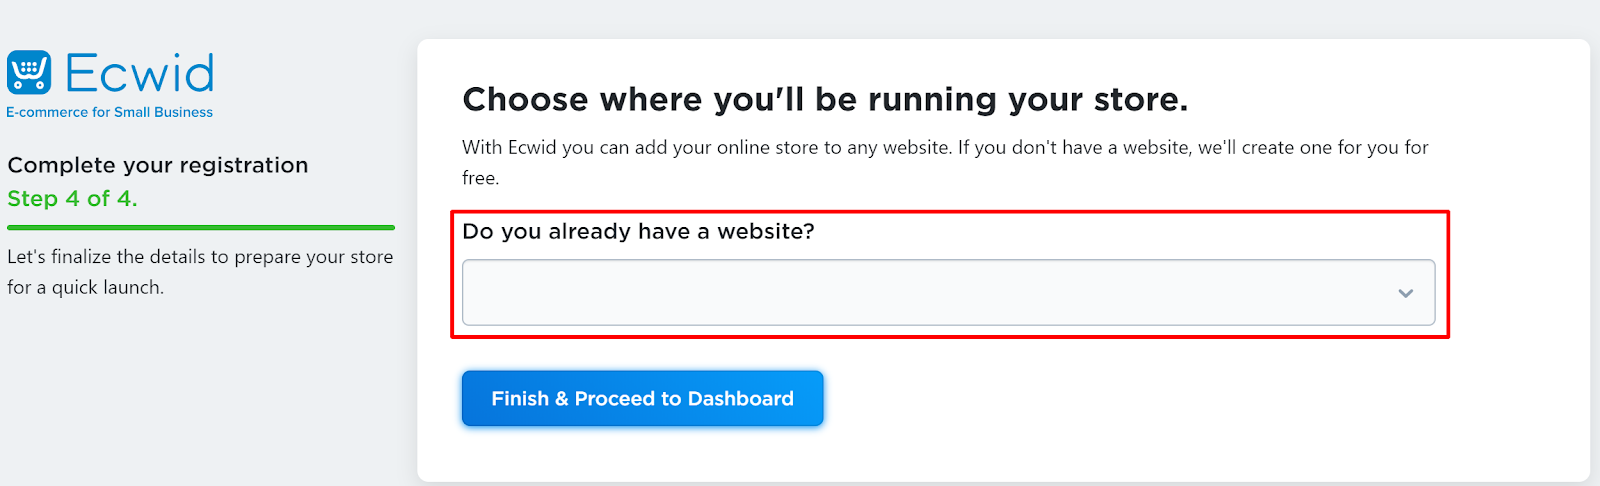
And now for the final step in the registration process!
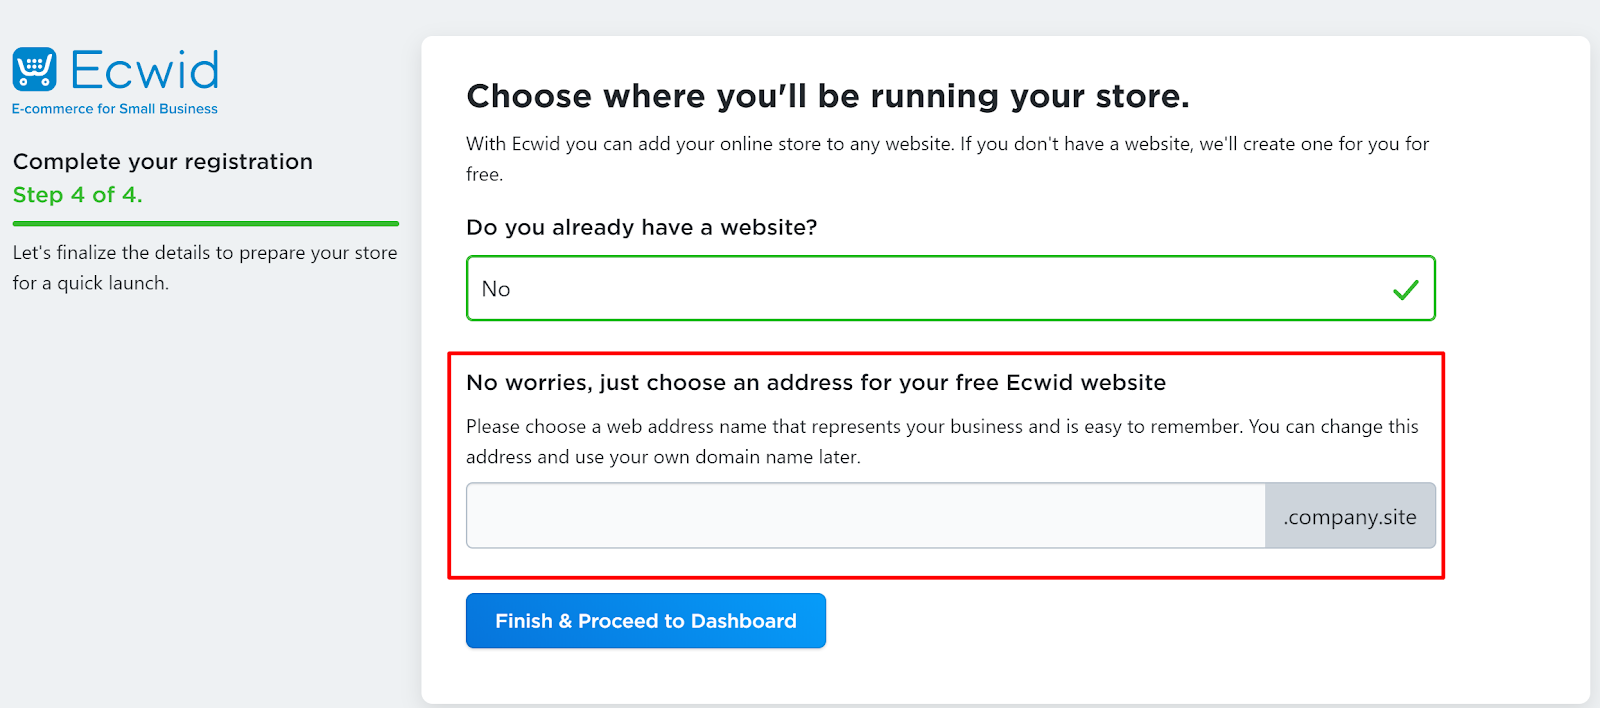
If you don’t yet have a website, simply select “No” from the drop-down and Ecwid will enable you to set up one with their platform at no cost.
If you don’t want to use Ecwid for your website, you can always utilize other website building platforms. All across the internet, you can find amazingly helpful tutorials for WordPress, Wix, Squarespace, and many other platforms.
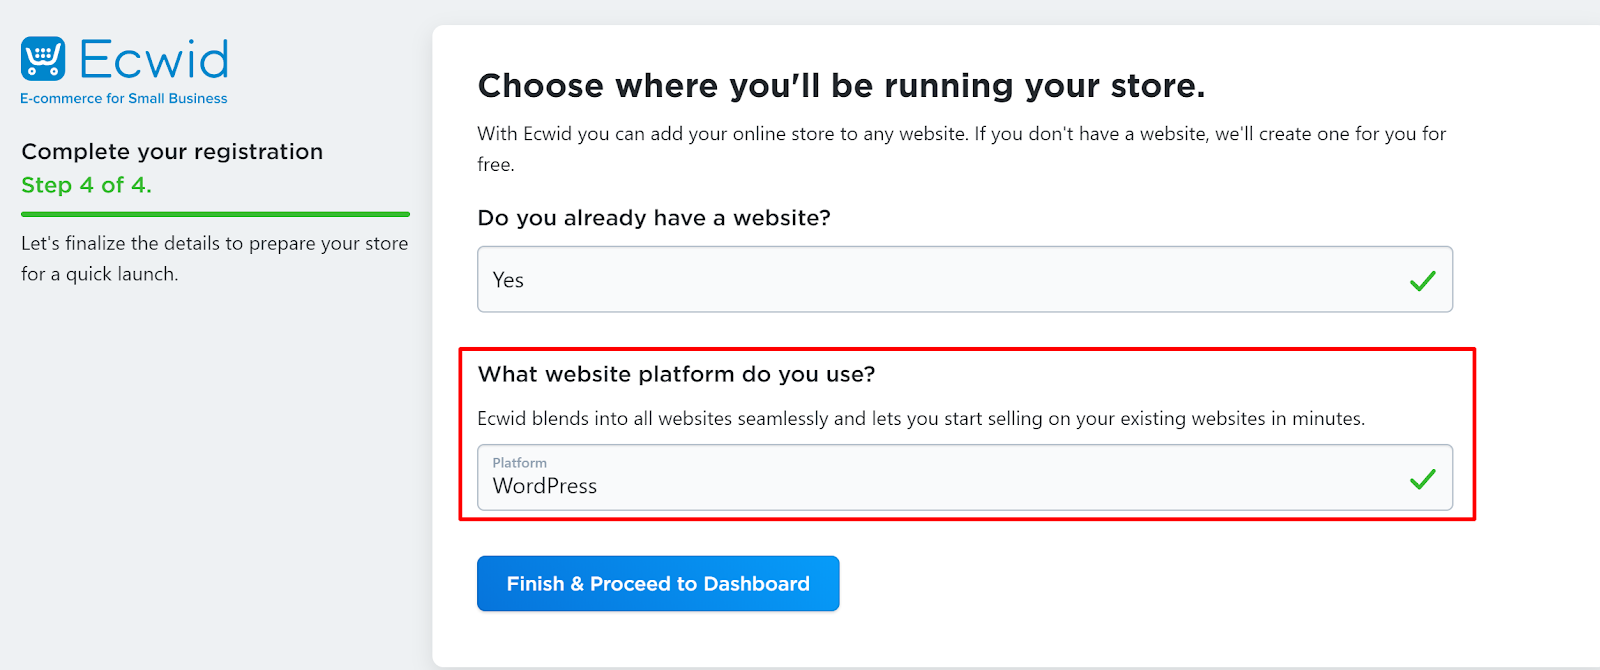
Once you have your website set up on an external platform, simply head back over to Ecwid and select which platform you used in the dropdown.
Setting Up The Rest of Your Ecommerce Store
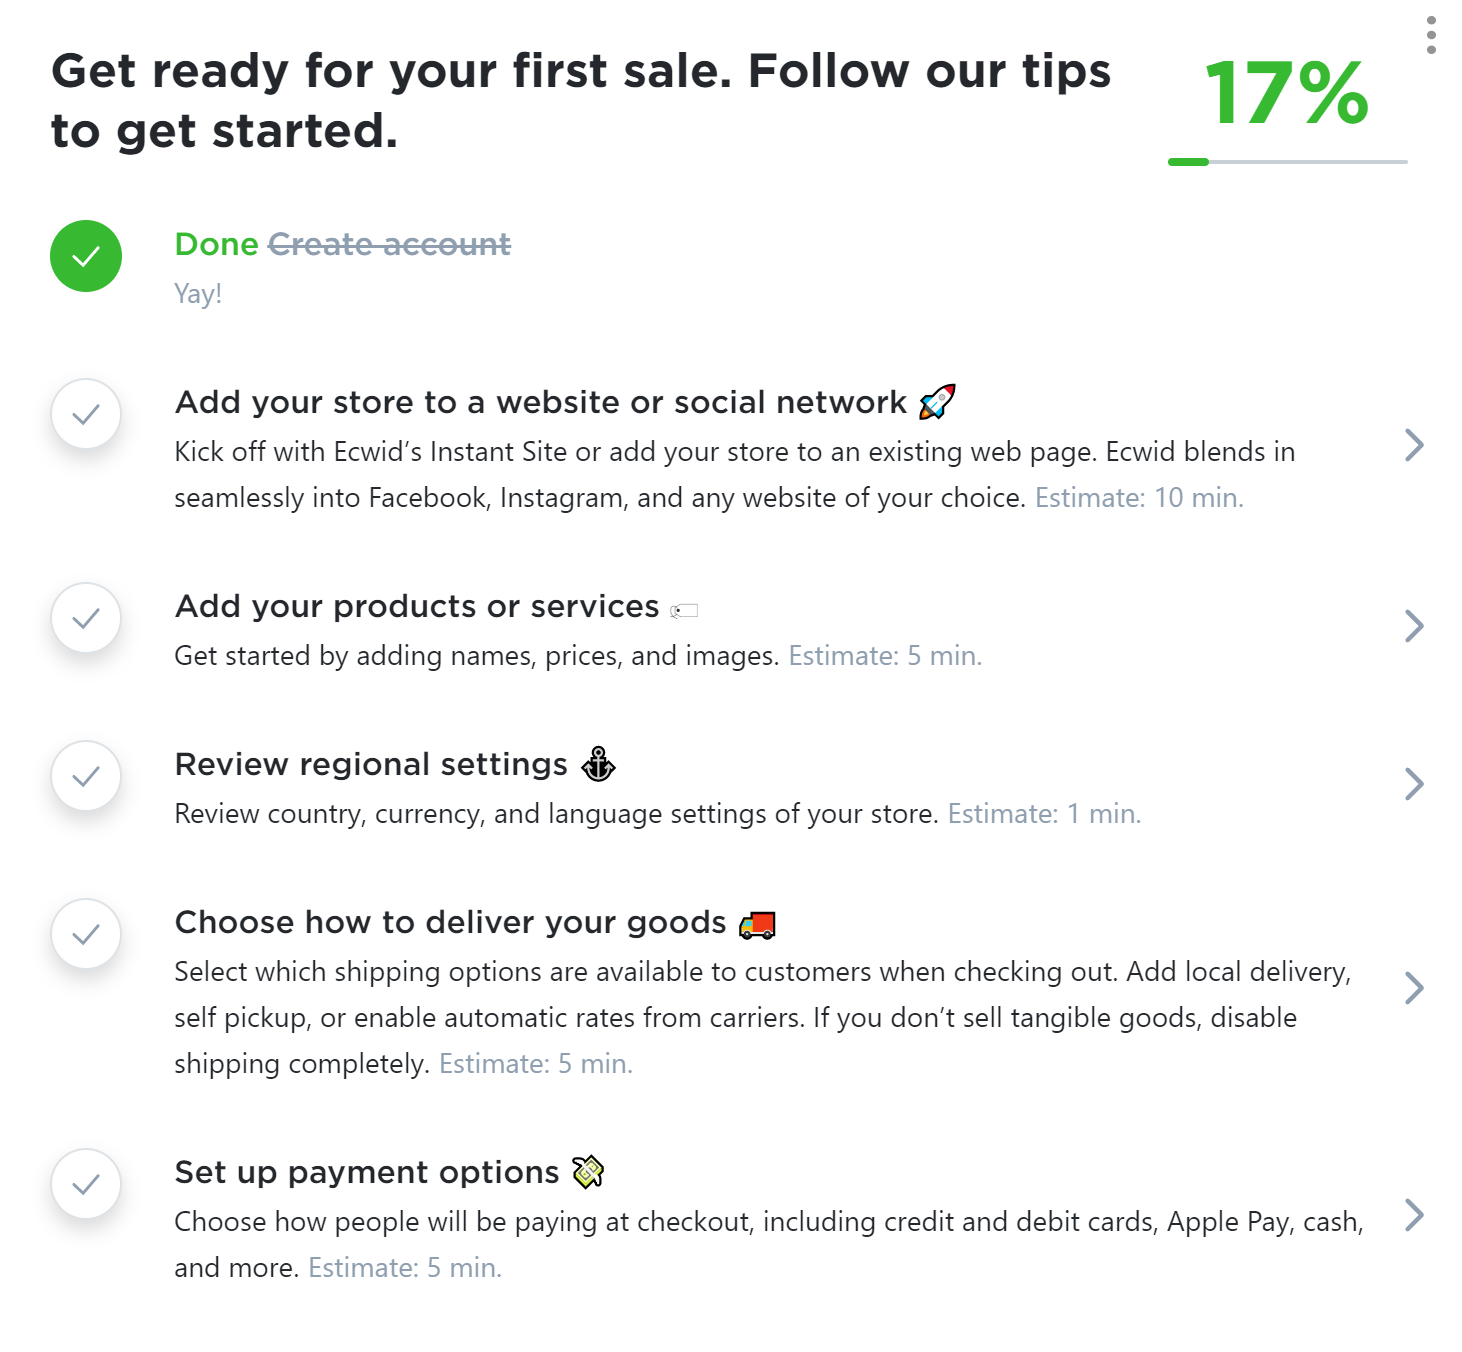
Now that you’ve finished the registration process there are only a few more steps separating you from your fully functioning eCommerce site.
If you’re using an external website builder platform, you’ll want to connect it to your store on Ecwid. However, if you went ahead with Ecwid’s free online storefront service, you can move on to adding your products or services.
Adding Products or Services to Your Store

The first thing you’re going to see when you get to the Products page is a button that lets you add new products, another button next to it that allows you to import products from a list, and then several sample products below.
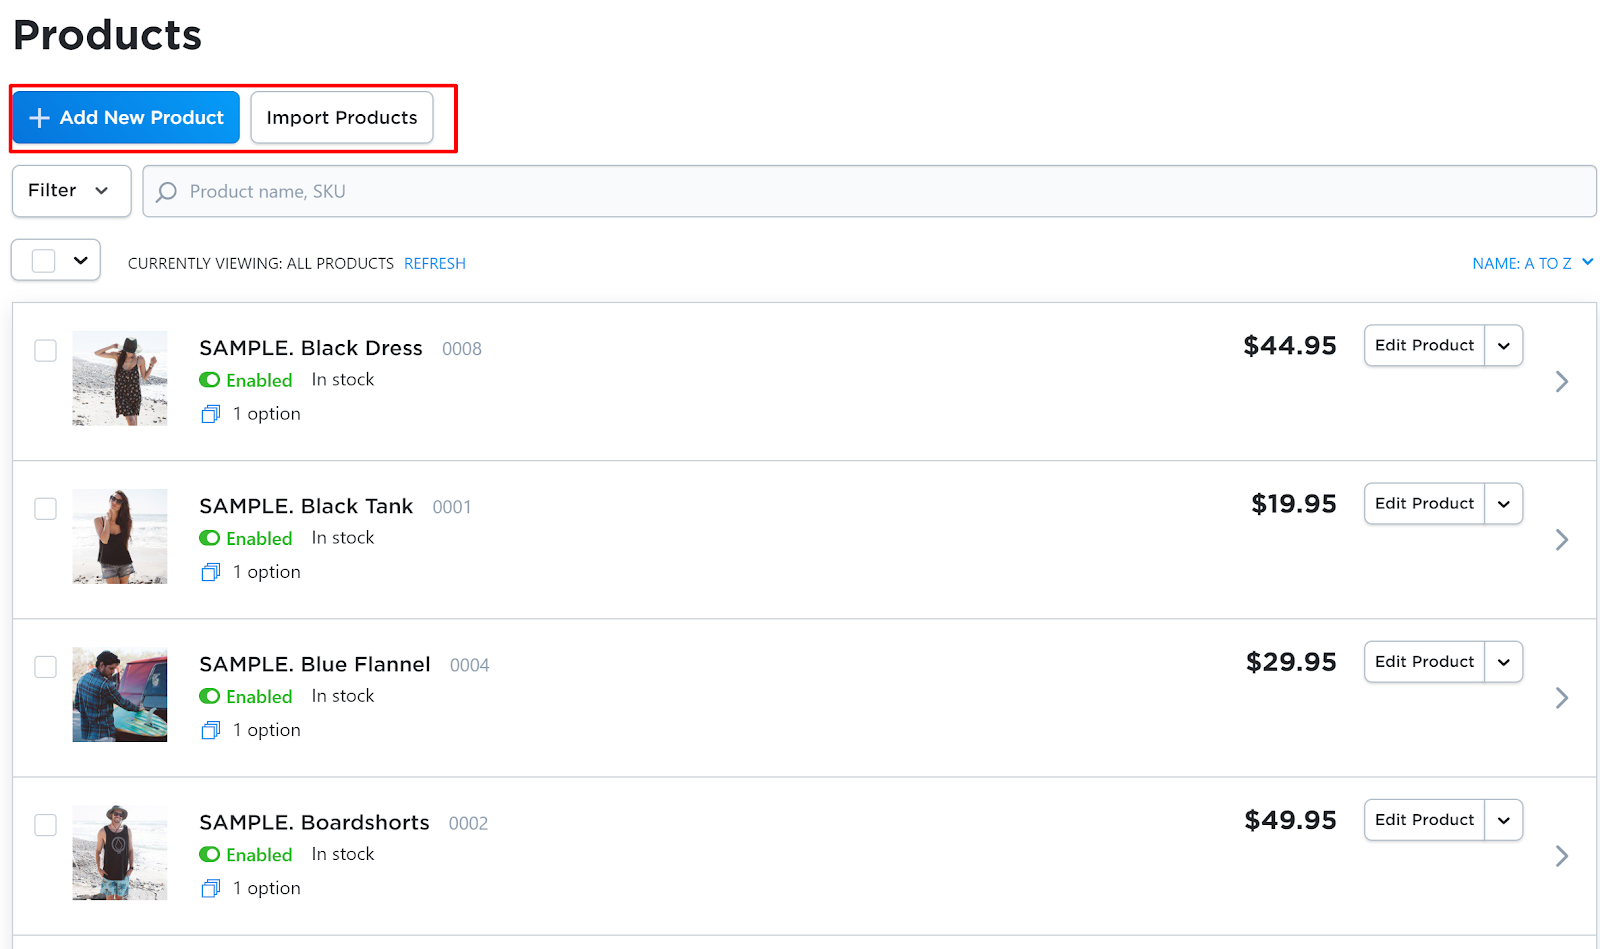
Click on Add New Products.
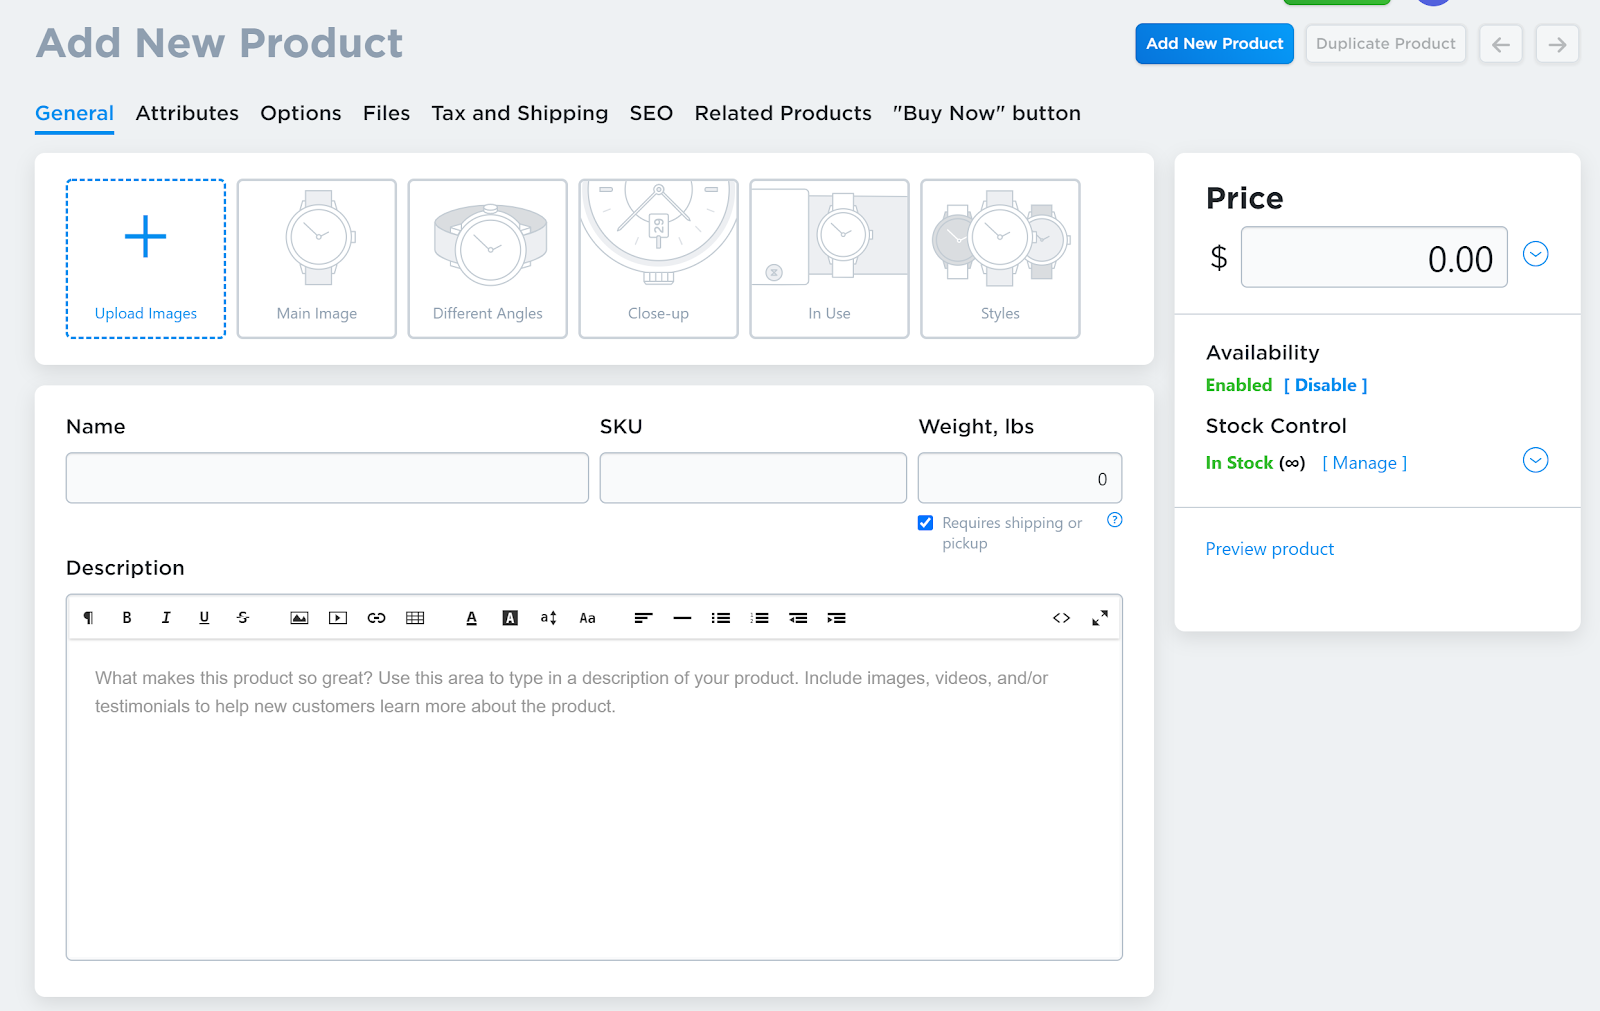
On this page, you’ll be able to:
- Set the product’s price
- Add the product’s name
- Insert the product’s SKU number
- If needed, add in the product’s weight
- Enter the product’s description
- Set the price
- Upload product images
Ecwid also allows you to add a number of additional details about your product, including:
- Related products
- Files
- Attributes
- SEO
- Taxes and Shipping
- “Buy Now” button
From this page, you’ll even be able to toggle the availability of your stock and preview your prepared product before you make it live on the site.
Once you’ve added all your products and customized them to your liking, go back to the dashboard to move onto the next step.
Reviewing Your Ecommerce Store’s General Settings

Here is where you fill out the remaining details regarding your eCommerce store.

As you can see from the image above, you can change your store name, location, and update your company details as well.

At the bottom of the general settings page, you’ll have the option to change your company address and link it to any of your social media profiles.
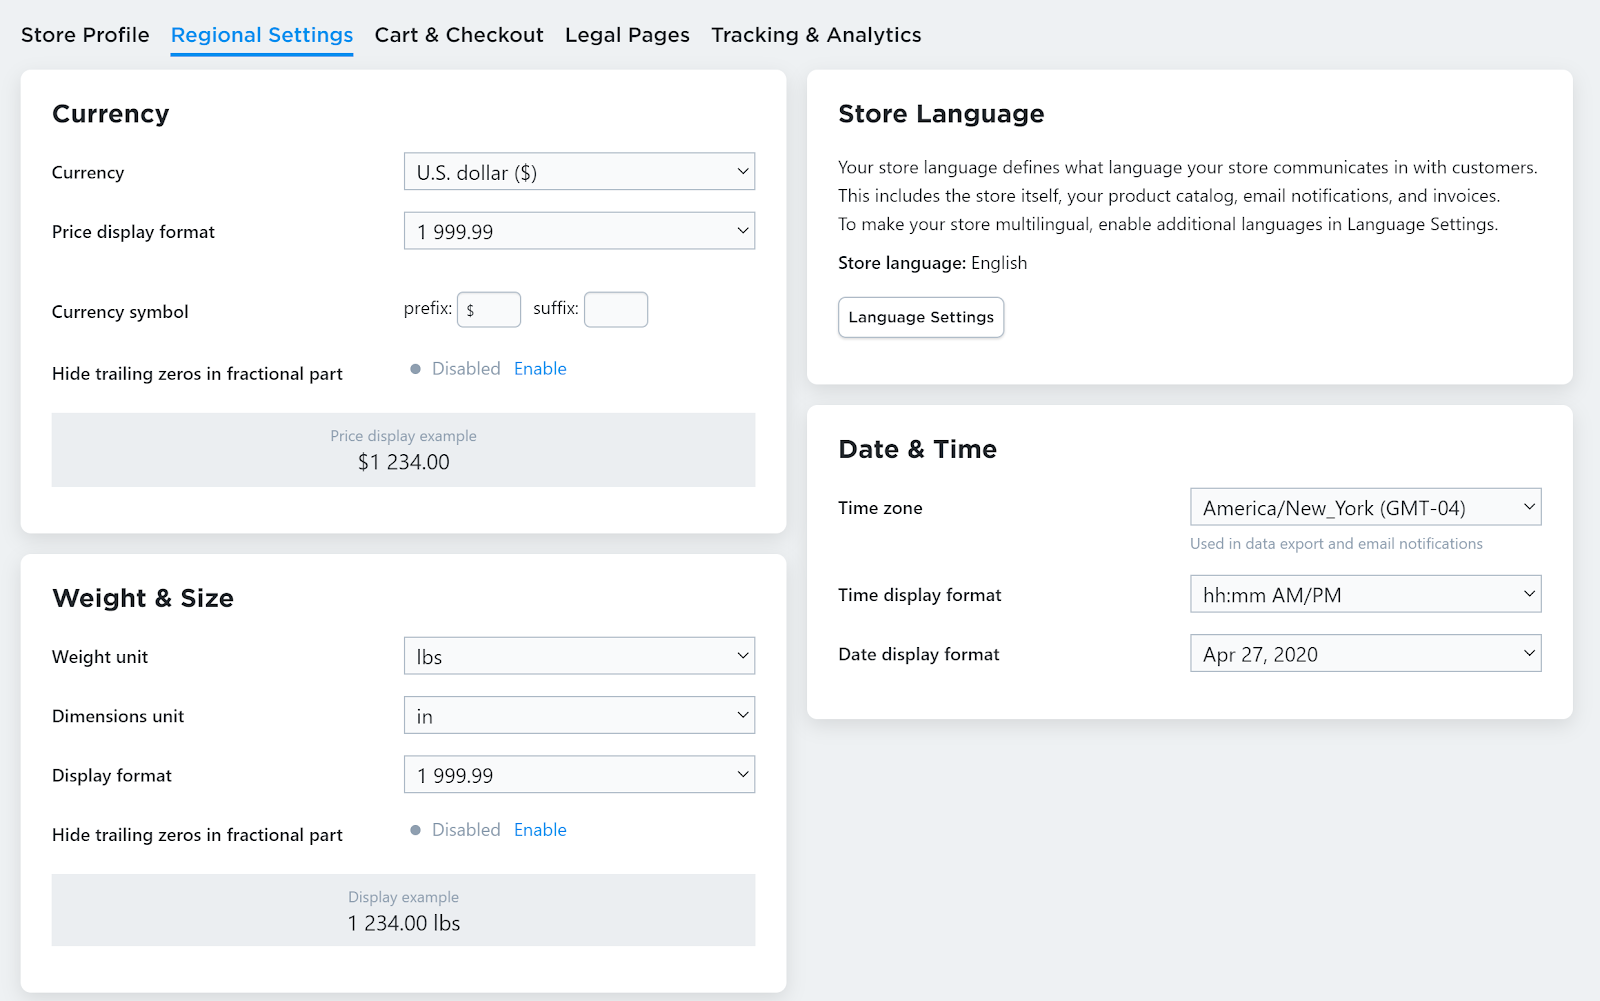
In the regional settings tab, you’ll be able to set your currency, price display format, and other important details.
This page also includes tabs for Legal Pages, Carts & Checkout, and setting up Tracking & Analytics, but you can swing back to those when the other basics of your eCommerce site are up and running.
For now, let’s head back to the dashboard.
Shipping Details and Adding a Pickup Option
Having awesome products displayed beautifully on your Ecwid store won’t mean much if your customers can’t get their purchased goods, which is why we’re now going to show how to set up your shipping options.
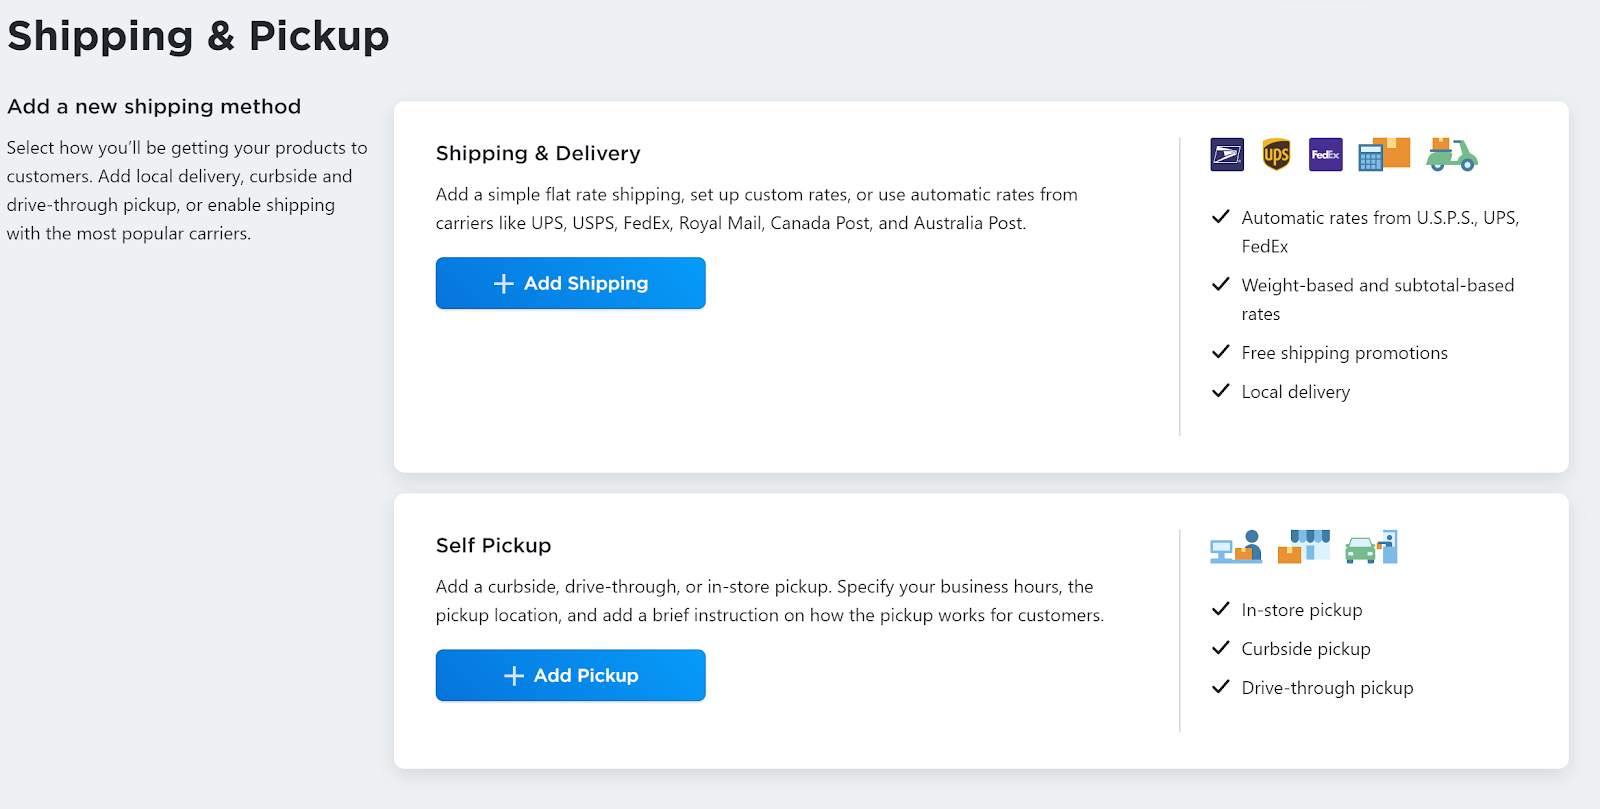
On the shipping & pickup page, you’ll be presented with two choices: Self Pickup and Shipping & Delivery.
If you don’t have a physical store than you don’t have to worry about self pick-up. We’ll still go into both on the off-chance that you do, however.
The first step to setting up your shipping method is to click the “Add Shipping” button.

You’ll be taken to a page where you’ll be allowed to choose from popular shipping services like U.S.P.S., UPS, and FedEx. You also have the option to set up local delivery. Click on whichever service you prefer.
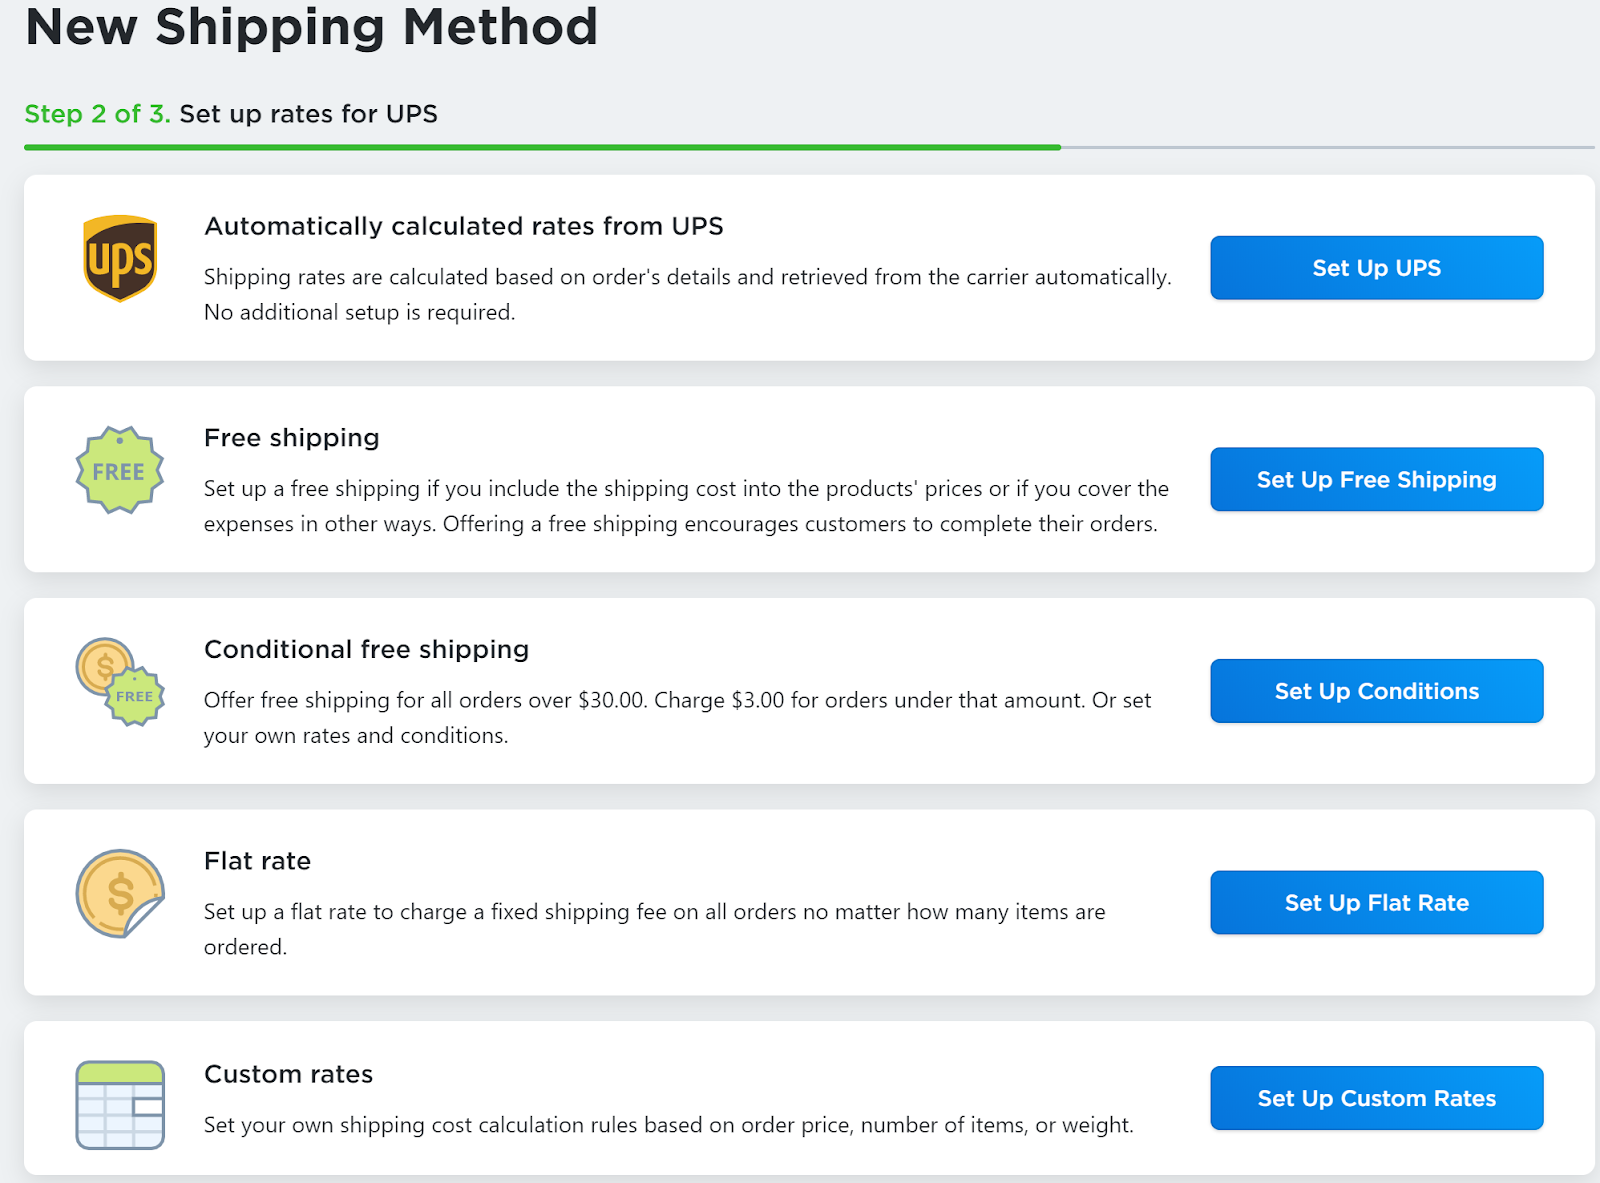
In this example, we’ll be setting up shipping with UPS.
The next step is to decide if you want to go with free shipping, conditional free shipping, flat rate, or custom rates. If you want to keep things simple, just select the top option which automatically calculates rates with UPS. That’s what we’ll be doing here.
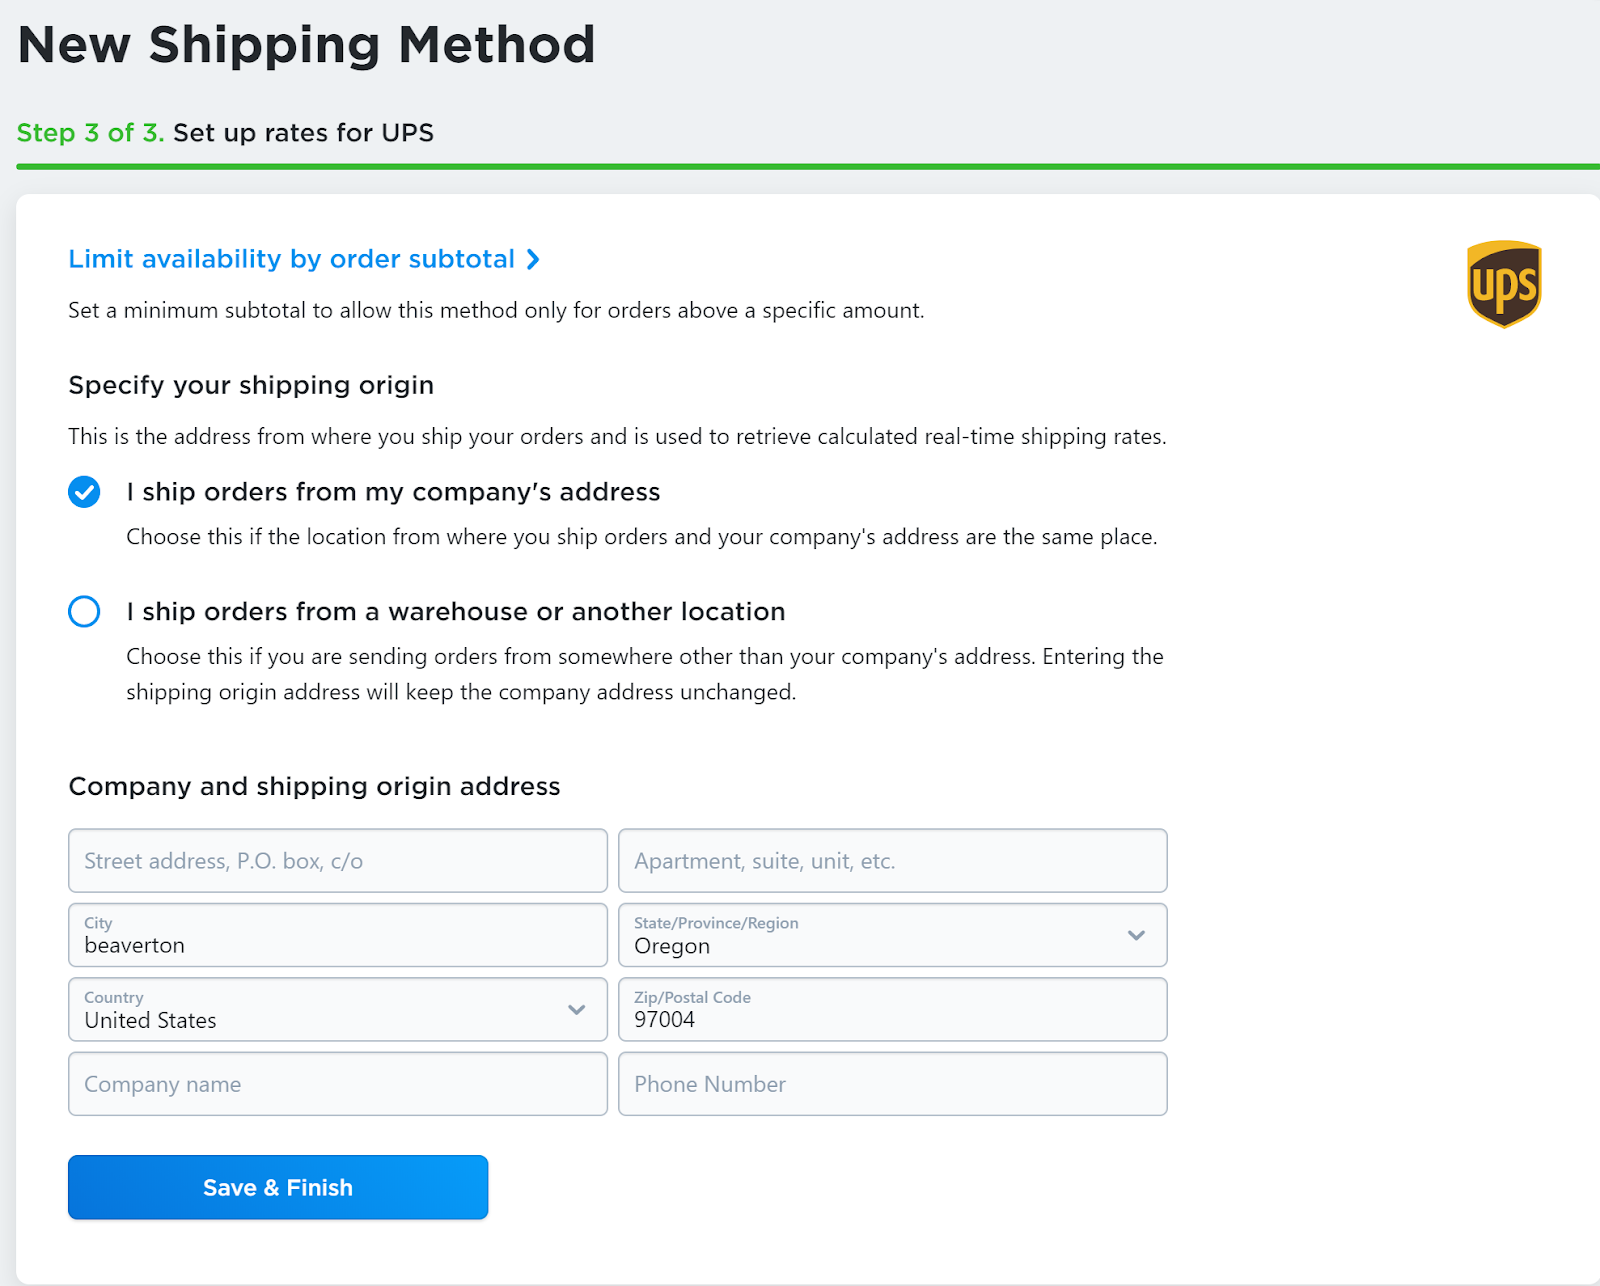
In order to finish the automatic rate calculator, you’ll need to decide if you’re going to ship orders from your company address, a warehouse, or another location. Both options more or less require you to fill in the same details.
The only difference is that, if you’re shipping orders from your company address, you need to enter the name of your company as well as your business’s phone number.
After you’ve filled in those details, just click “Save & Finish.”
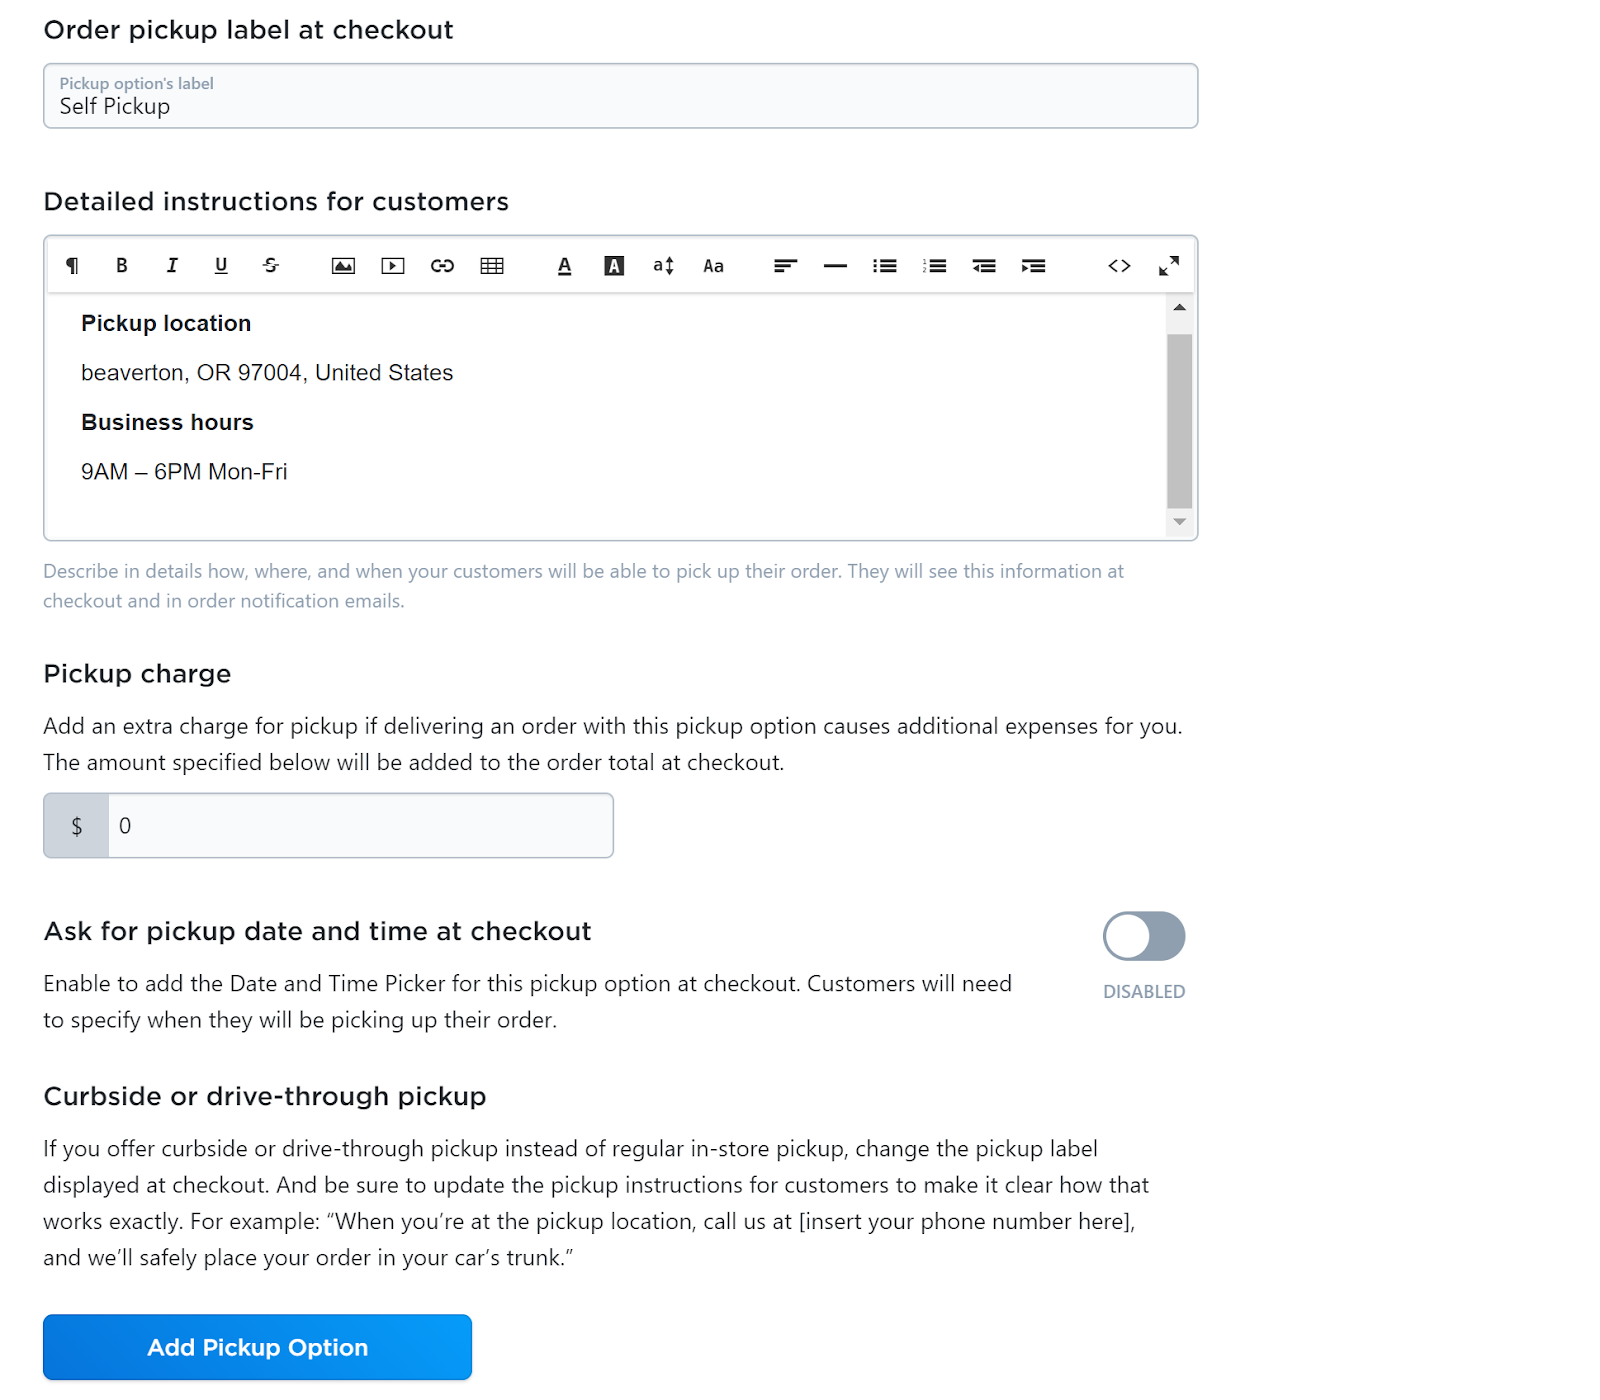
If you chose the Self Pick-up option, all you’ll need to do is create the pick-up label, write out the instructions for customers, and then settle on a price. You can also toggle the Date and Time Picker for an even more specific pick-up experience.
Once those details are filled out, hit the “Add Pickup Option” button.
Setting Up Payment Options for Your Ecwid Store

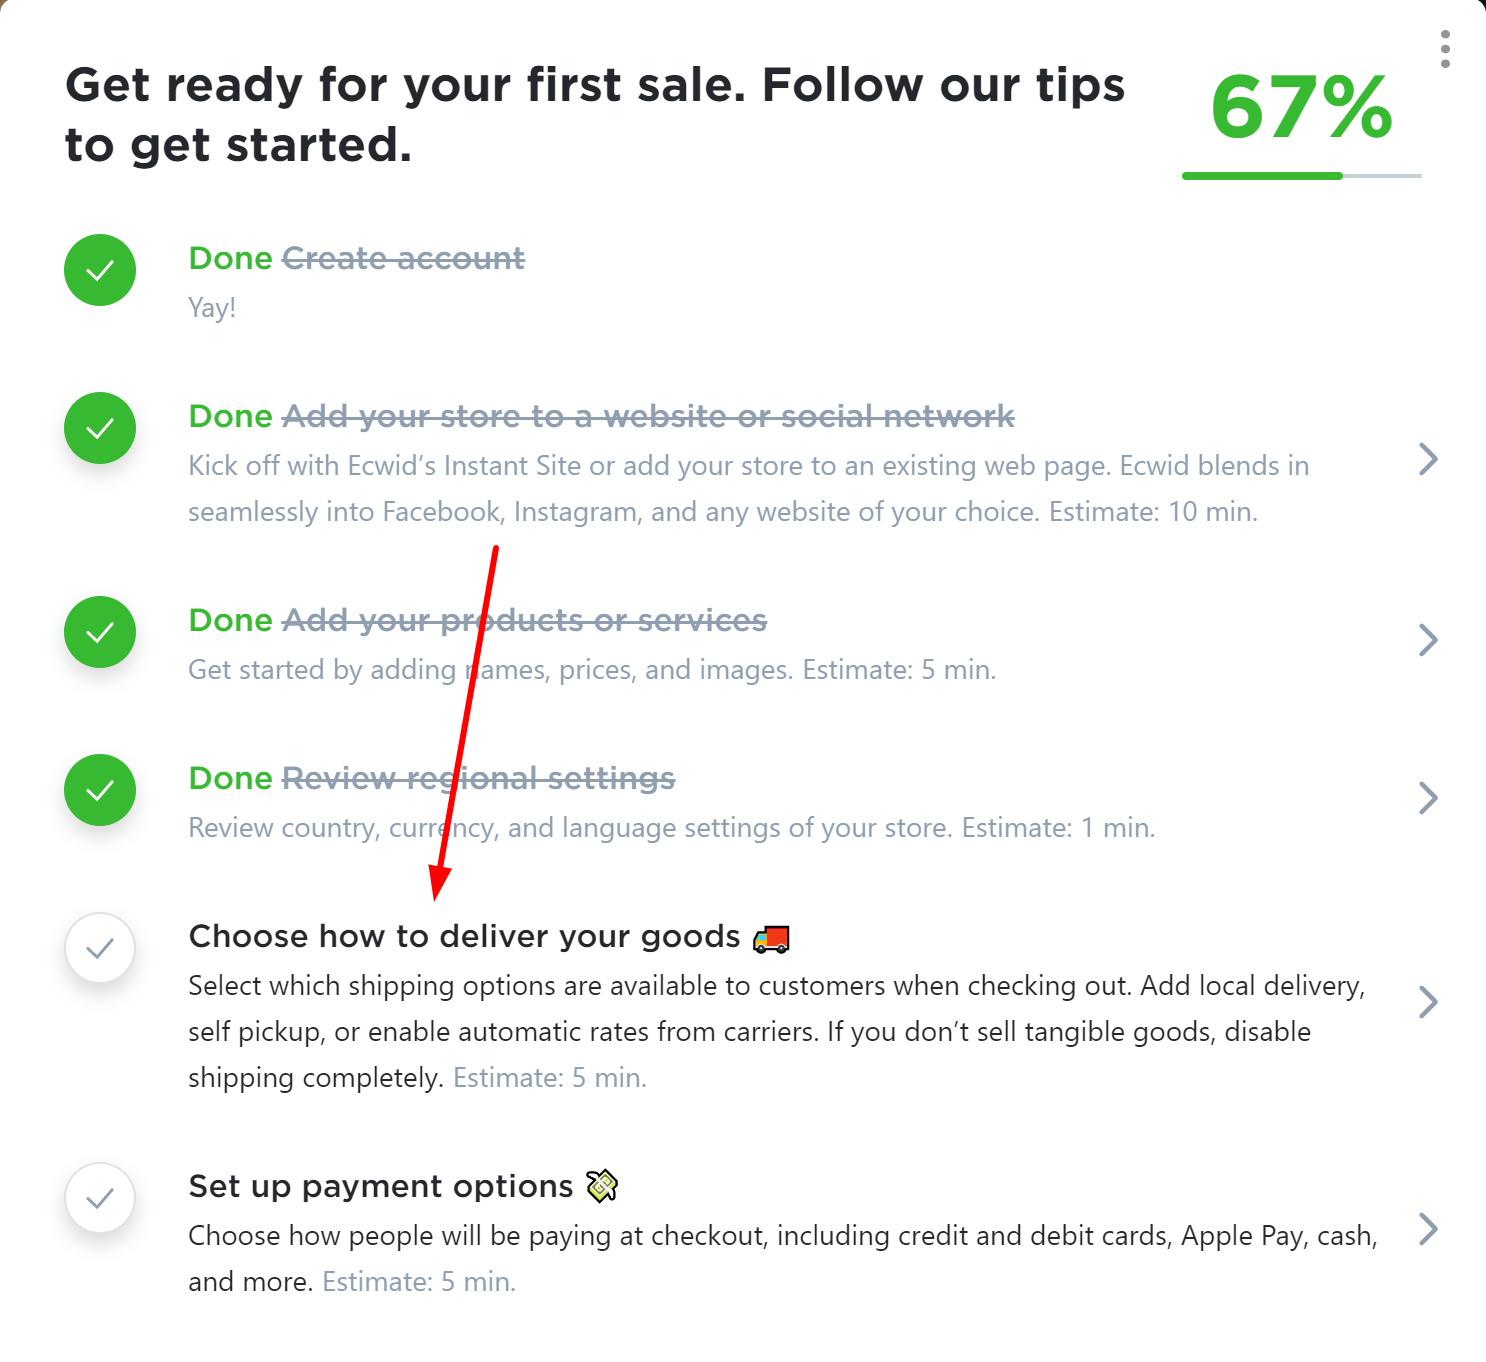
We’re 83% finished with setting up your online store!
The final step is to setup your payment options.
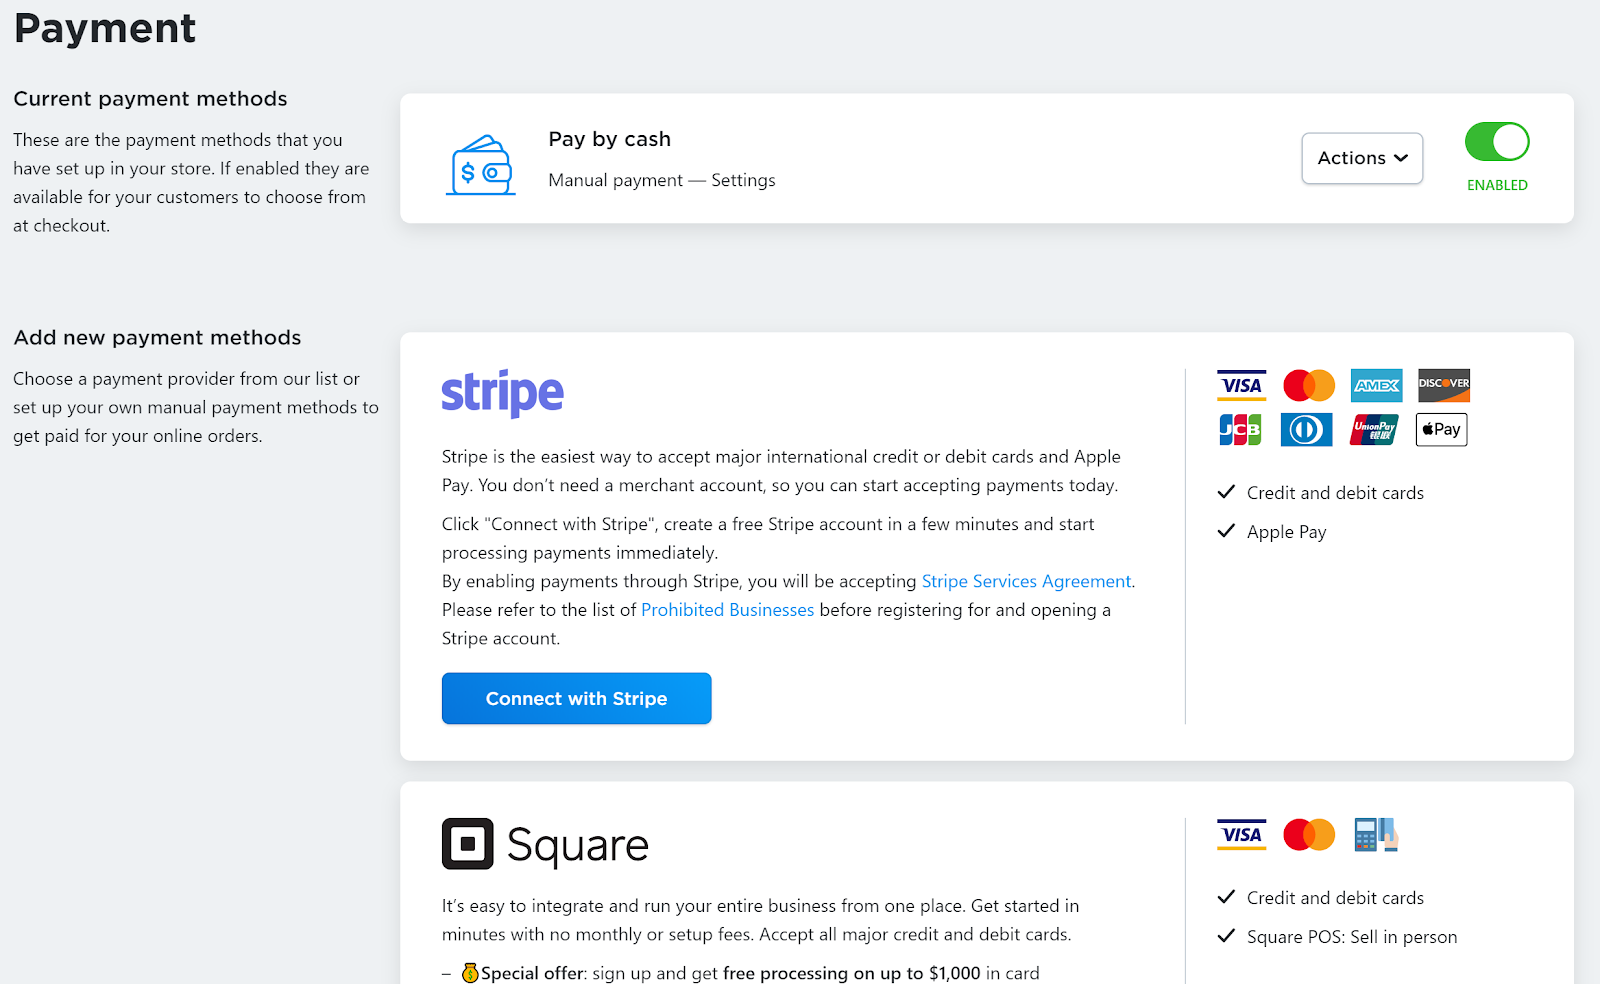
Paying by cash is automatically enabled, but you can toggle that setting from the payment page.
For online payment setup, the default options available are Square, Stripe, and Paypal, but if you scroll down, you’ll find additional ways to set up payments.
If you have an account with any of the default options, simply click the “Connect with…” button and your payment method should be quickly connected to your Ecwid account.
If you don’t have an account with any of the default payment methods, clicking the “Connect with…” button will prompt you to set up an account with them.
Get Ready to Start Selling

Hooray! You’ve now completed the basic set-up process for your free eCommerce website powered by Ecwid.
All that’s left now is to customize your site’s design to your preferences.
Play around with it–see what you like, and if you need some inspiration, check out these stunning eCommerce store designs.
Thanks for sticking around to the end, and good luck with your online business!
About Author

Dale McManus
Hey, I’m Dale! I’ve helped tens of thousands of people just like you from around the world create beautiful blog, portfolio, and business websites with our easy to follow guides and tutorials over at CreateAProWebsite.com.


